Nginx WebServer
In this blog, I will try to explain the process of deploying a React web application using Nginx. It begins with the prerequisites of having a React application developed using npm.
Generally we will be developing any web page using react or other frontend language and then will run them in our localhost to make sure everything is working fine.
So here after running the web page in the EC2 Instance, we will install nginx and use it as a reverse proxy for hosting our webpage and also if we can see how we can link nginx to the domain hostname.
Pre-requisites:
AWS account
An Ubuntu EC2 machine t2.micro (t2.micro is ok, if you are using simple application)
Create an EC2 Instance with Ubuntu OS of any instance type you like, t2.medium is preferable.
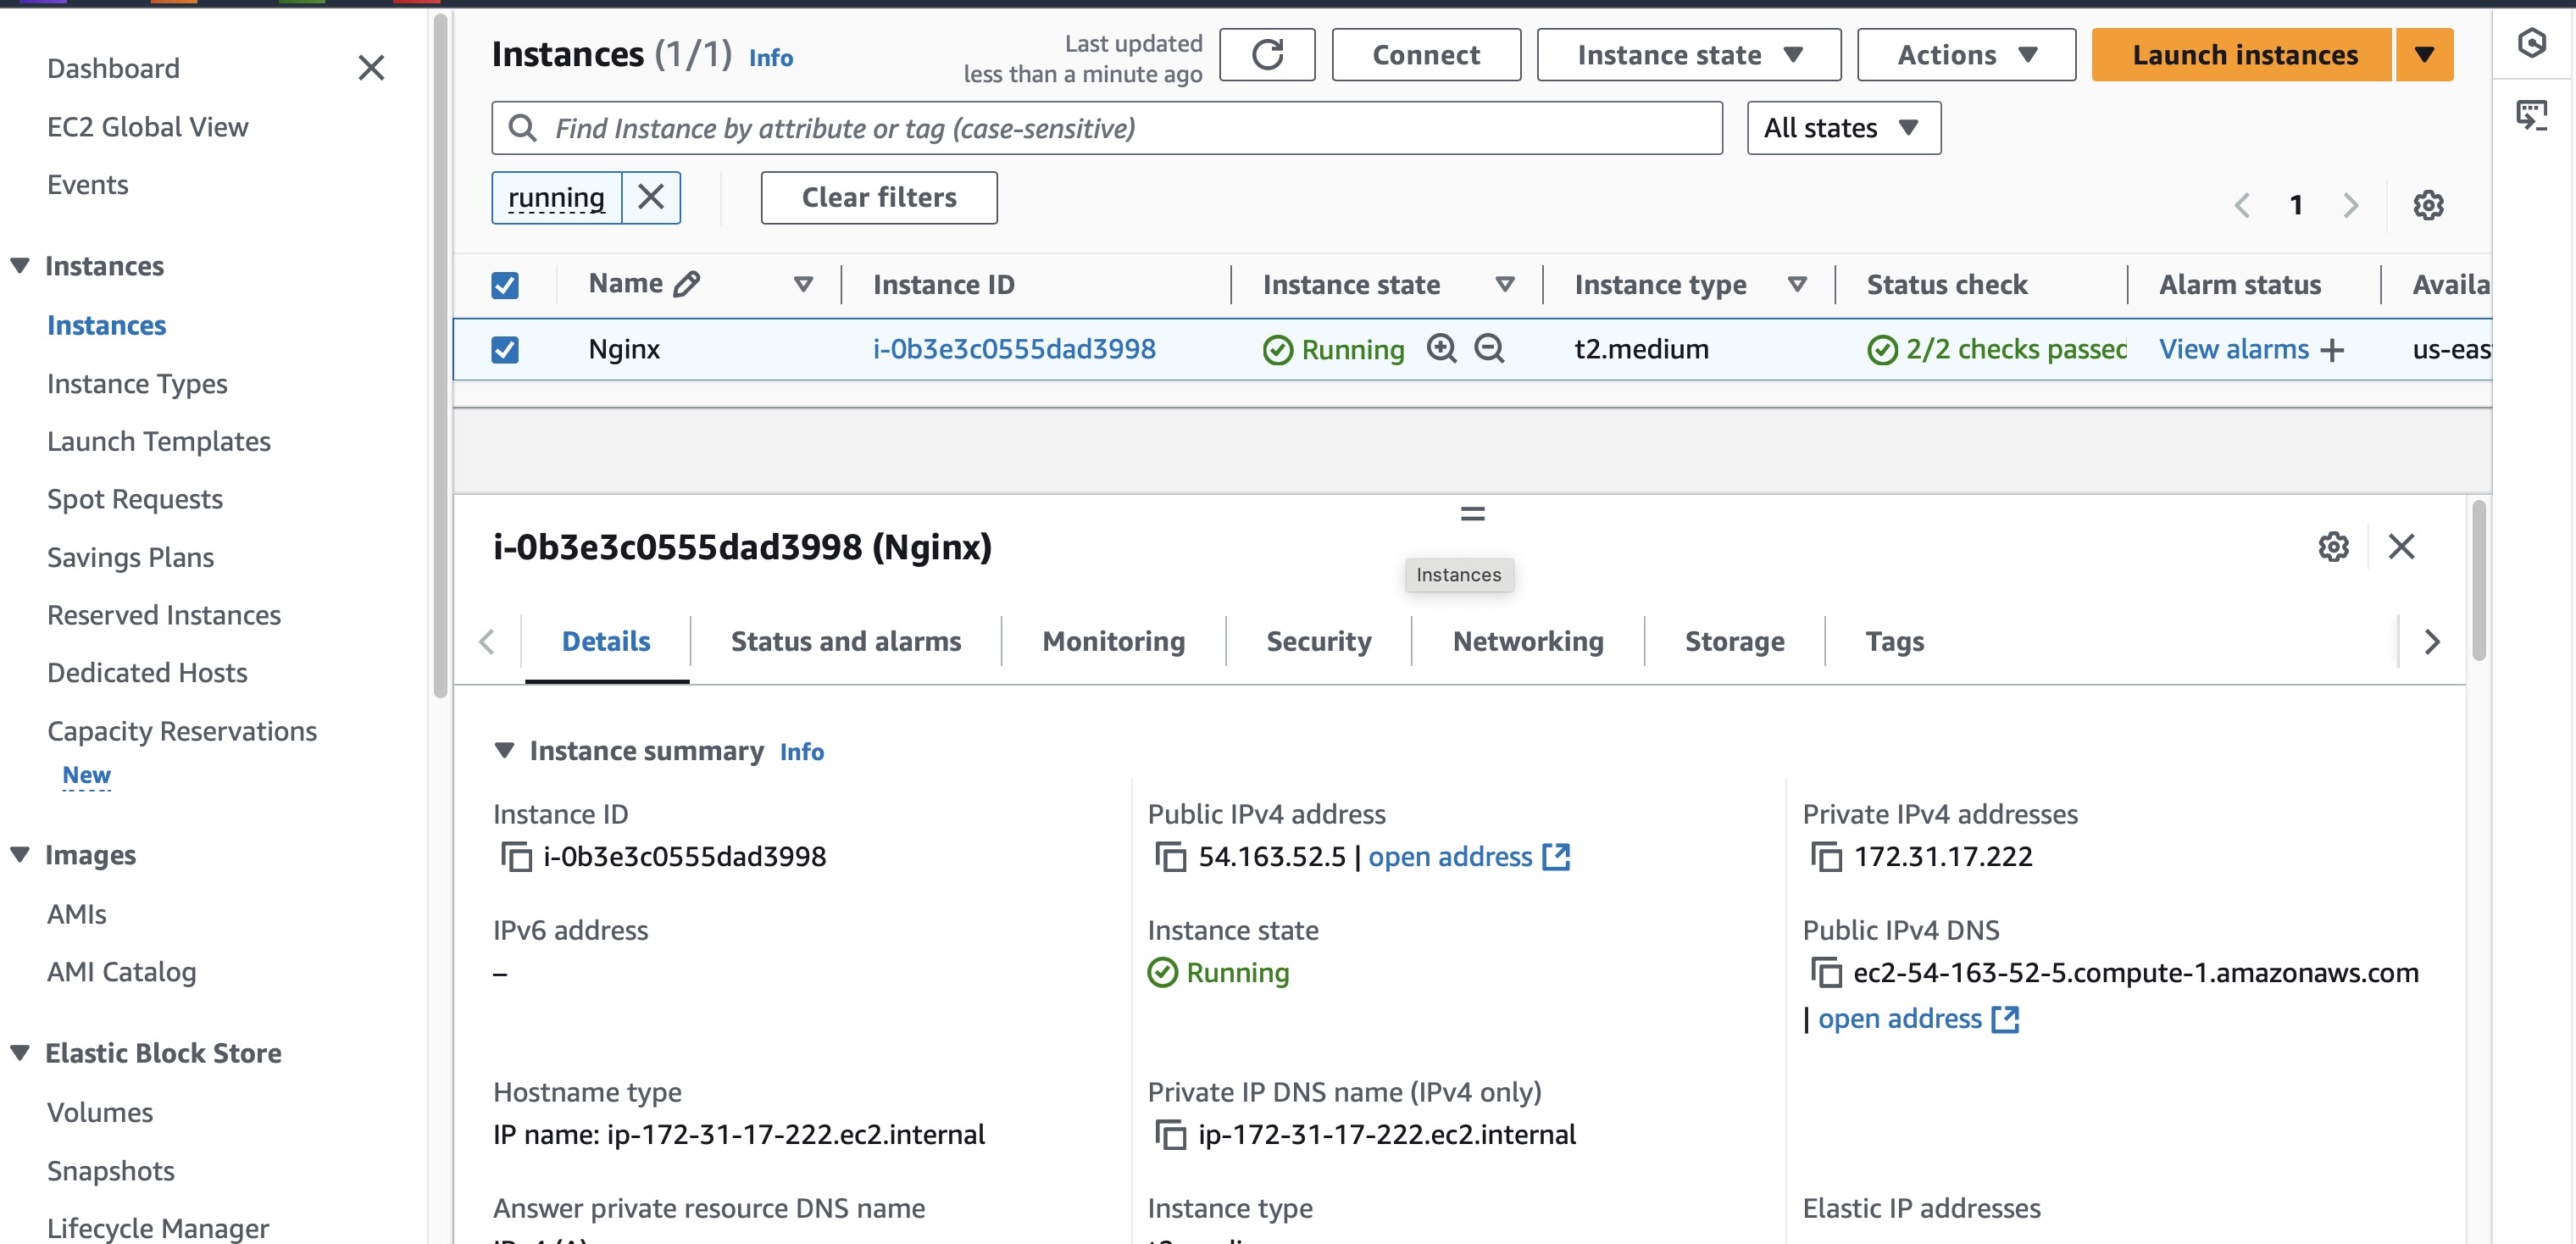
Once the Instance is created, now we need to update the Instance.
sudo apt update -y
As the project was bootstrapped with React App, we need to install Node JS and npm in our instance and also clone the git repo.
# installs nvm (Node Version Manager)
curl -o- https://raw.githubusercontent.com/nvm-sh/nvm/v0.40.0/install.sh | bash

# download and install Node.js (you may need to restart the terminal)
nvm install 20

# verifies the right Node.js version is in the environment
node -v # should print `v20.18.0`

# verifies the right npm version is in the environment
npm -v # should print `10.8.2`
git clone https://github.com/AnilKumar-Noolu/portfolio.git
Once everything is done, run the below commands to install rpm and then run it.
npm install
npm run
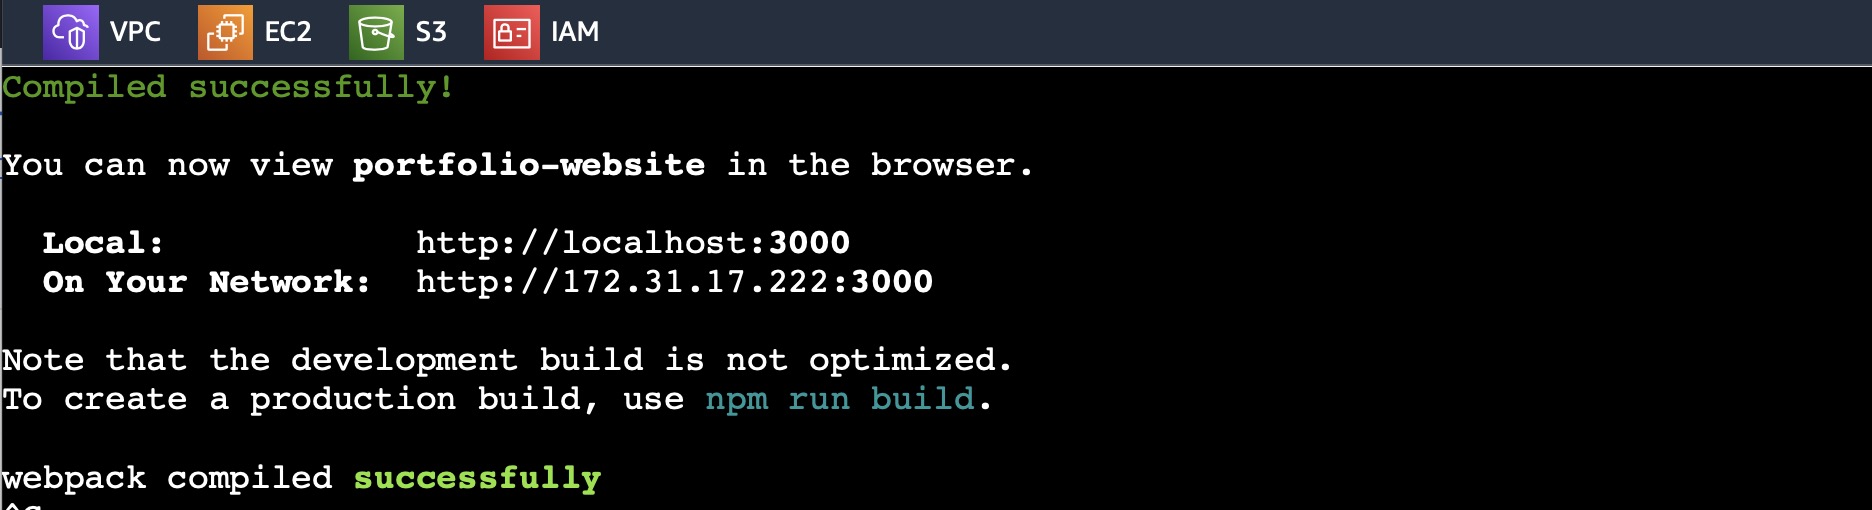
Once you have entered ‘npm run’ command you can see the above screen and you can check the application running fine on http://<ec2_ip-address>:3000

Now install nginx and we will host our applications action through nginx.
sudo apt install nginx
cd /var/www/html
We need static html and css files for nginx to work on. so for that run ‘npm run build’ in the portfolio folder and see whether the index and other css files generated.
Once the above command is run, you can see a new build folder being created and some static files getting generated in that folder.
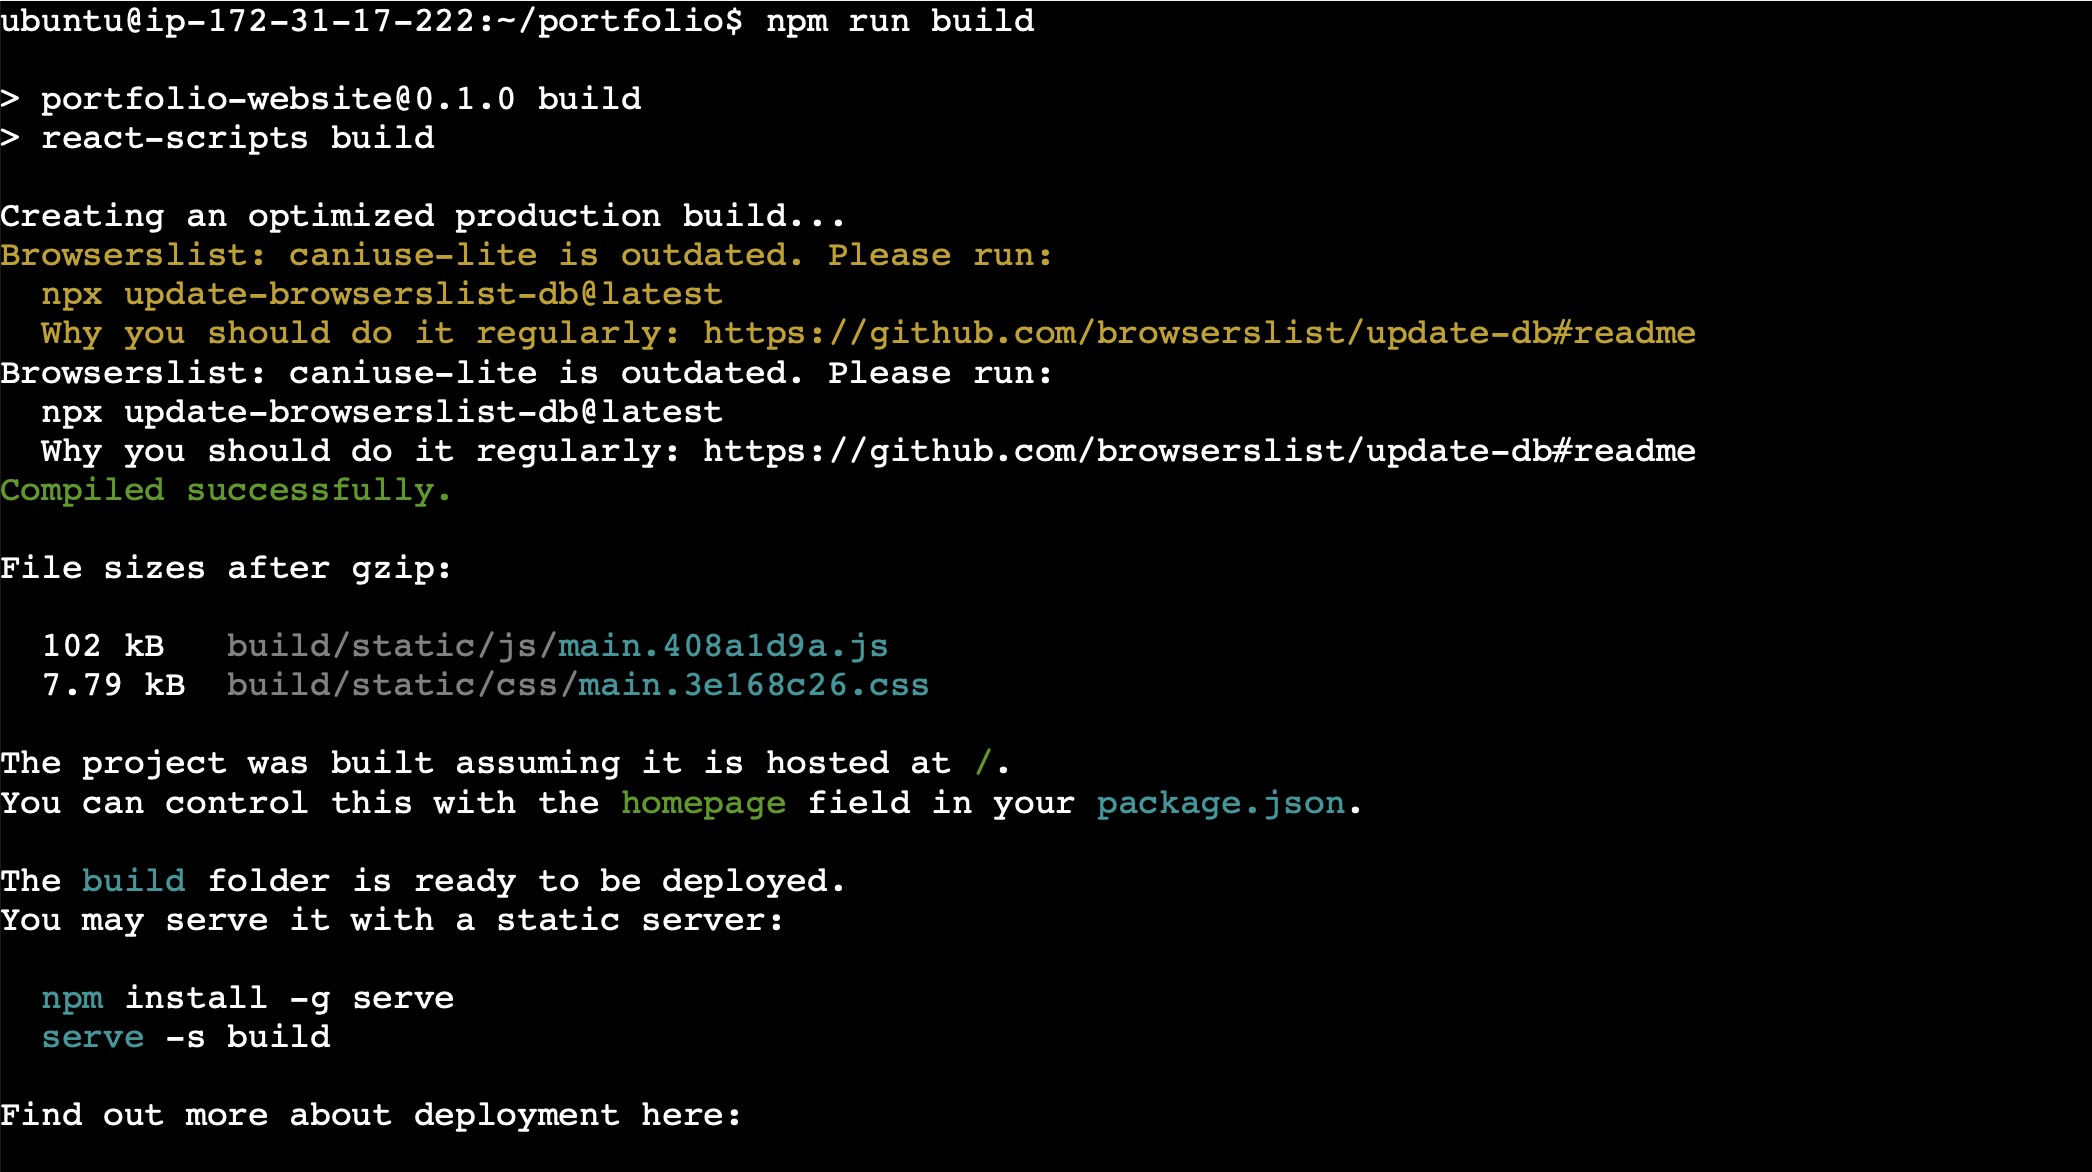
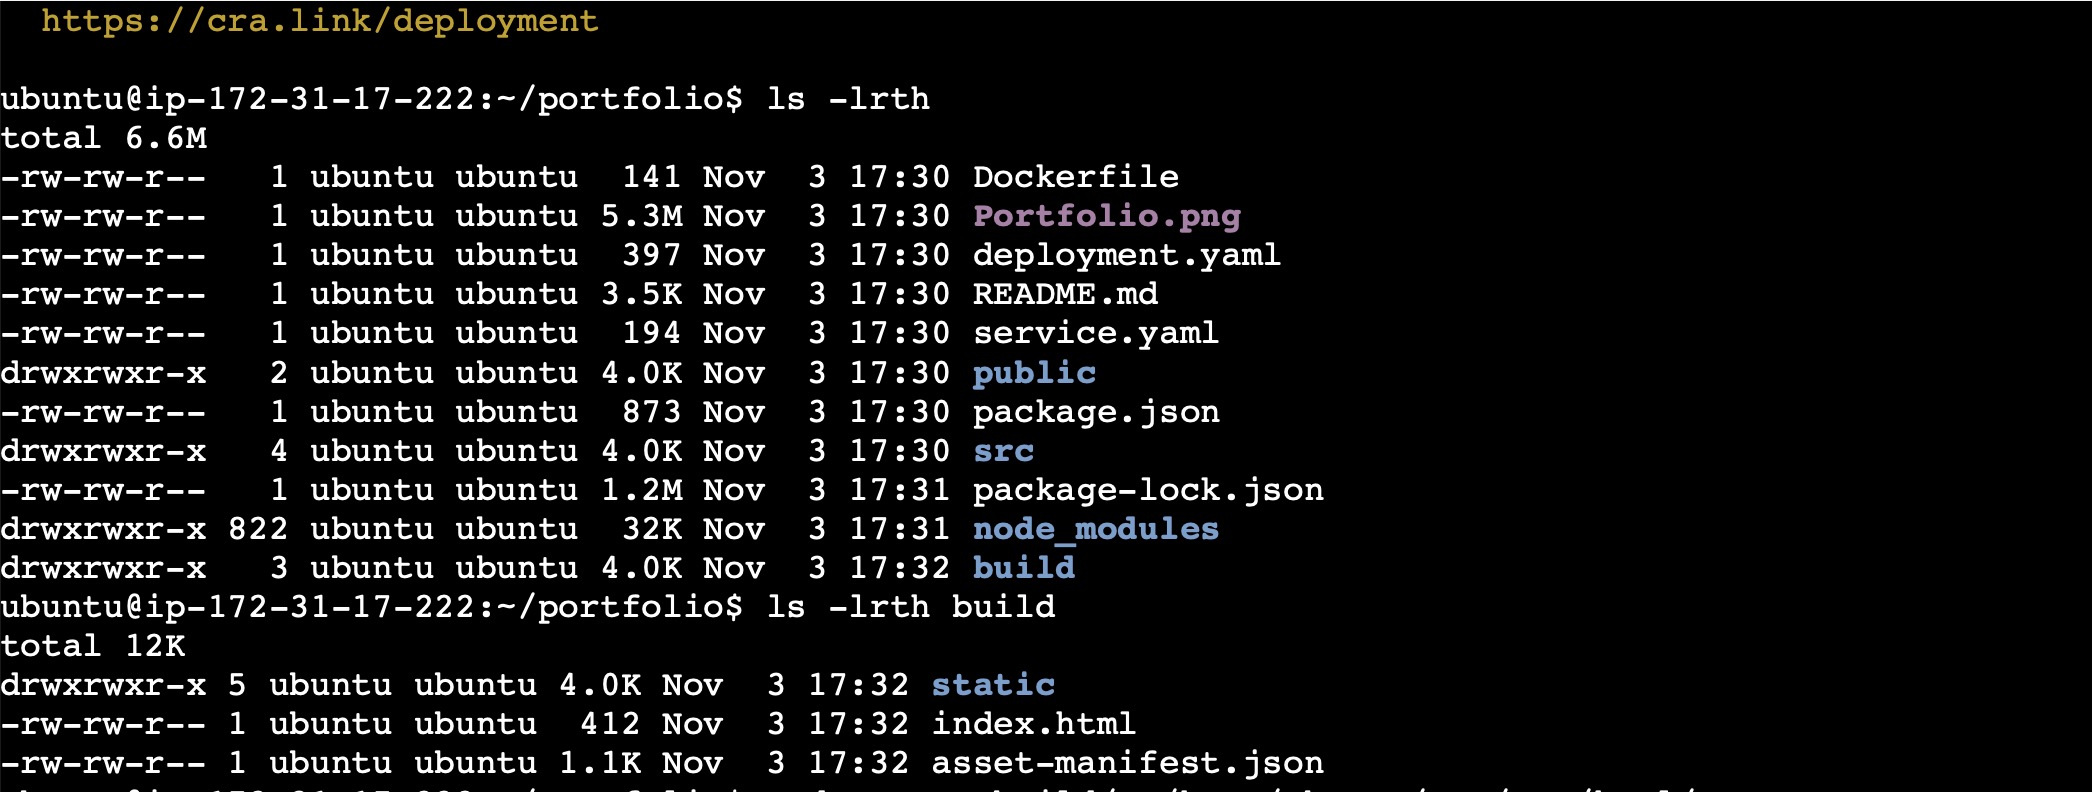
Copy all the above files to /var/www/html location.
ubuntu@ip-172-31-17-222:~/portfolio$ sudo cp -r build/* /var/www/html/
Once copying is done, now you can see the web page in <Ec2_ip_address>, no need to open 3000 port after Ip-Address.

Also in the location ’/etc/nginx/sites-available’, there will be a default file available for nginx which it follows, so change that file with server name as IP_address of EC2 Instance and other details and restart nginx.
ubuntu@ip-172-31-17-222:/etc/nginx/sites-available$ cat default
server {
       listen 80;

       server_name 54.163.52.5;

       root /var/www/html;
       index index.html;

       location / {
               try_files $uri /index.html;
       }
}

sudo systemctl restart nginx
Now, if you have a domain name registered then go to the domain name register and add “A” record to that domain to the EC2 IP Address as value.
In my case, I have a domain name named ‘malleshdevops.buzz’, So I have added a new A name for that domain and also changed the server_name to that domain name in default file of nginx in /etc/nginx/sites-available location.
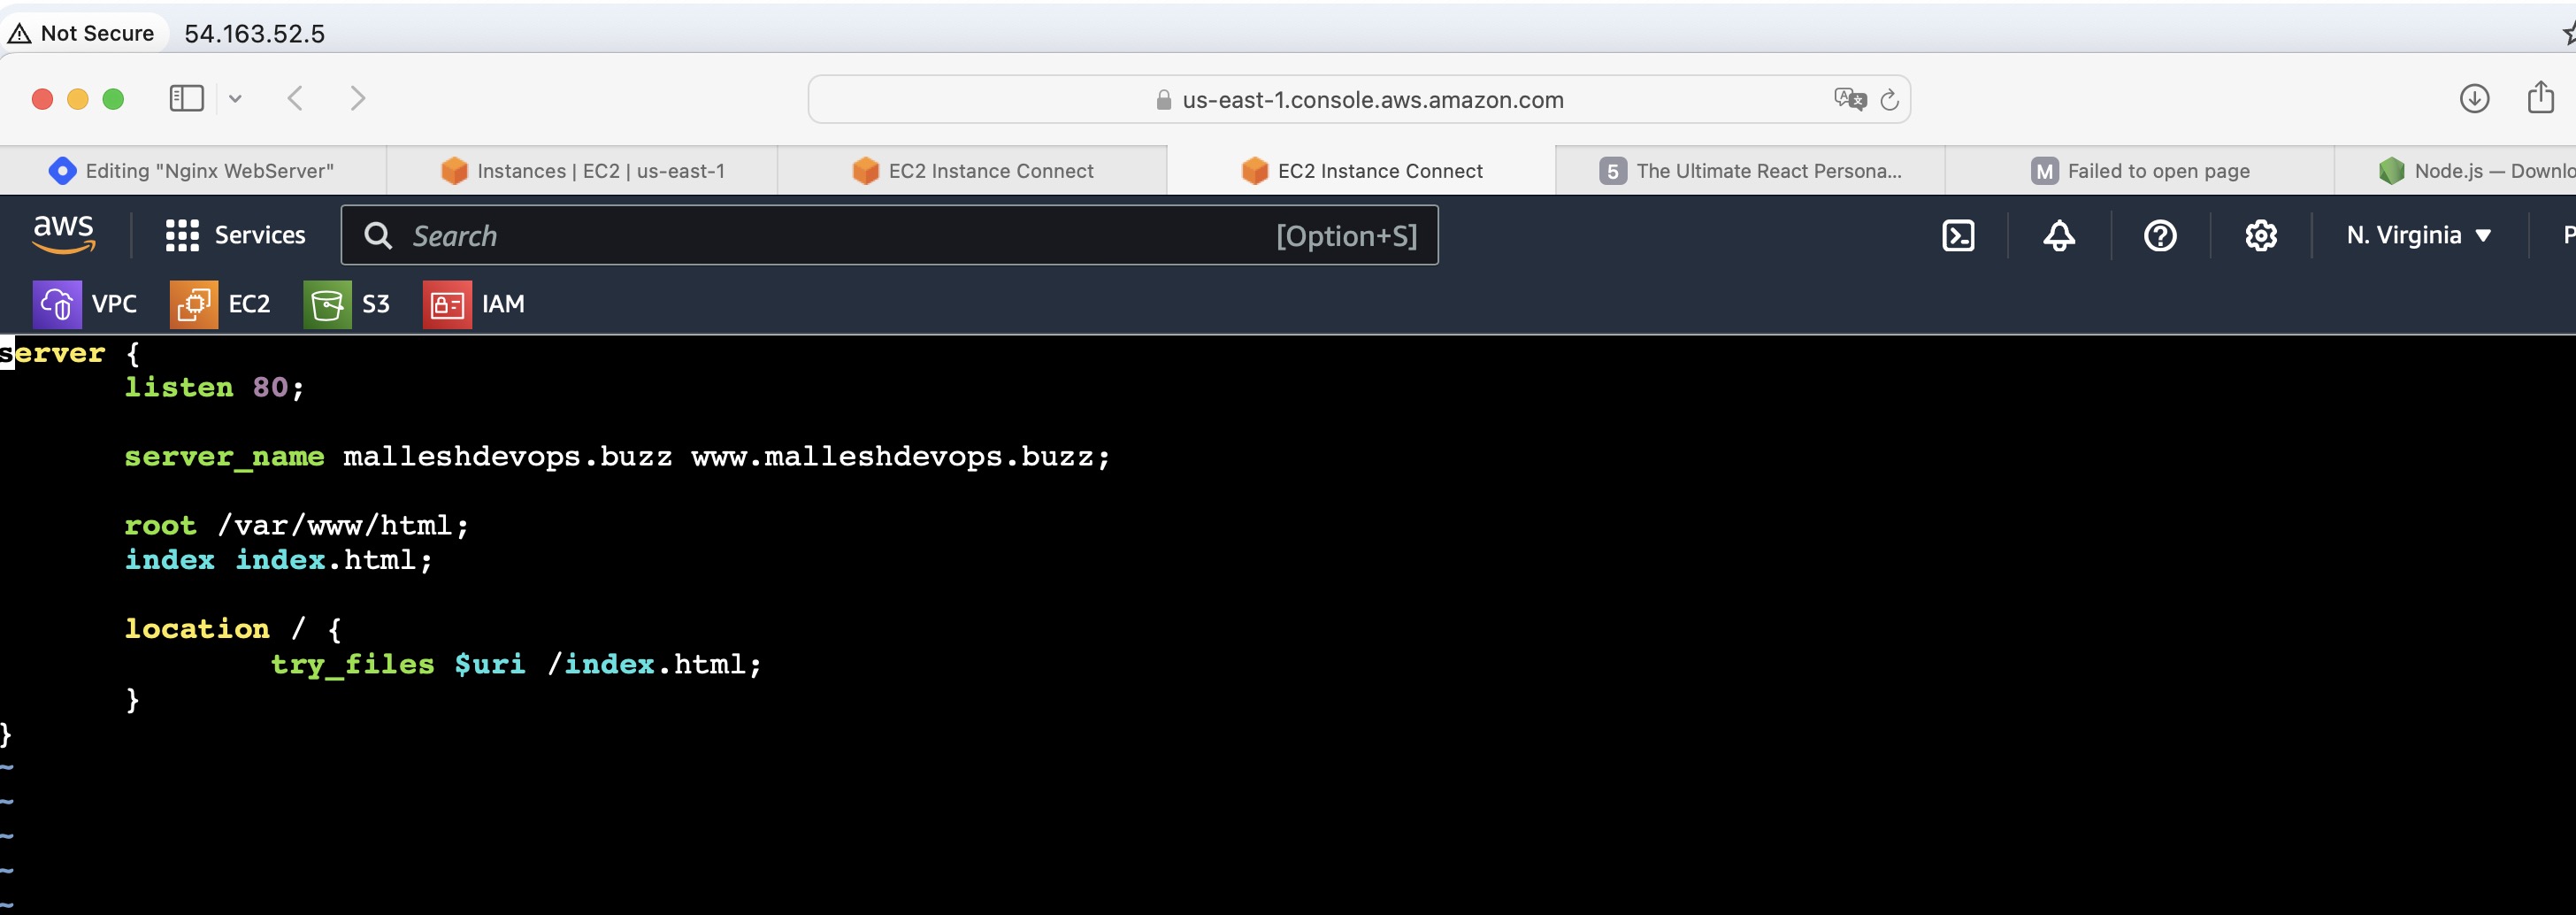
Reload nginx after that and you can see your website in your domain name.

In this way, you can use nginx to host your web page with your registered domain name.
Thanks for reading!!